Words by Tara Pepper
Bobby and I had the great pleasure of hosting a Ukrainian dinner for my friends from the office and their husbands, wives and partners. It was so much fun, and I’m very grateful for this wonderful group of people who make going to the office fun, entertaining, educational and a pure joy. I wanted to get us all together so they’d know how much they mean to me and I couldn’t think of a better way to do that than to cook for them.
 Since I’m Ukrainian, I decided to put on a feast of some of the dishes I grew up with and some that I’ve discovered along the way. We started with some delicious kolbassa and cured sausages from Dnister Ukrainian Store at St. Lawrence Market—my favourite little Ukrainian shop. I also bought a delicious store-made sausage that I roasted in the oven and served with our main course; it comes coiled in a circle that made for a nice presentation on the buffet table. Cheese cubes and nuts rounded out the treats while we were waiting for everyone to arrive.
Before I served the first course, we had to have a toast—with frozen vodka shots! Polish vodka is the best! One “nazdarovya” (“to your health”) later, and our meal was underway.
For the first course, we had borscht (beet soup); ruby red with shaved beets. It’s one of my favourite dishes, and I think it was the first time that some of my guests had ever tasted it. They told me they liked it.
Following that, our menu consisted of holubtsi (cabbage rolls), pyrophy (perogies), chicken livers, the sausage I mentioned above, krokiety (cr?pe rolls filled with meat and cheese; probably more Polish than Ukrainian, but I love them), bigos (or kapusta: sauerkraut with mushrooms and smoked meat), and a tossed salad. Lots of food, huh? I started cooking on Wednesday for a Saturday dinner!
For the holubtsi, I like to use soured or pickled cabbage and stuff it with a mixture of beef, pork, veal and rice. The pickled cabbage gives them a little edge that you don’t get when using fresh cabbage, but they’re good that way too. You can find pickled cabbage in the European supermarkets around town. I made 60 holubtsi and now have lots of leftovers in the freezer! That’s the best part of this type of cooking: it’s not only for one meal.
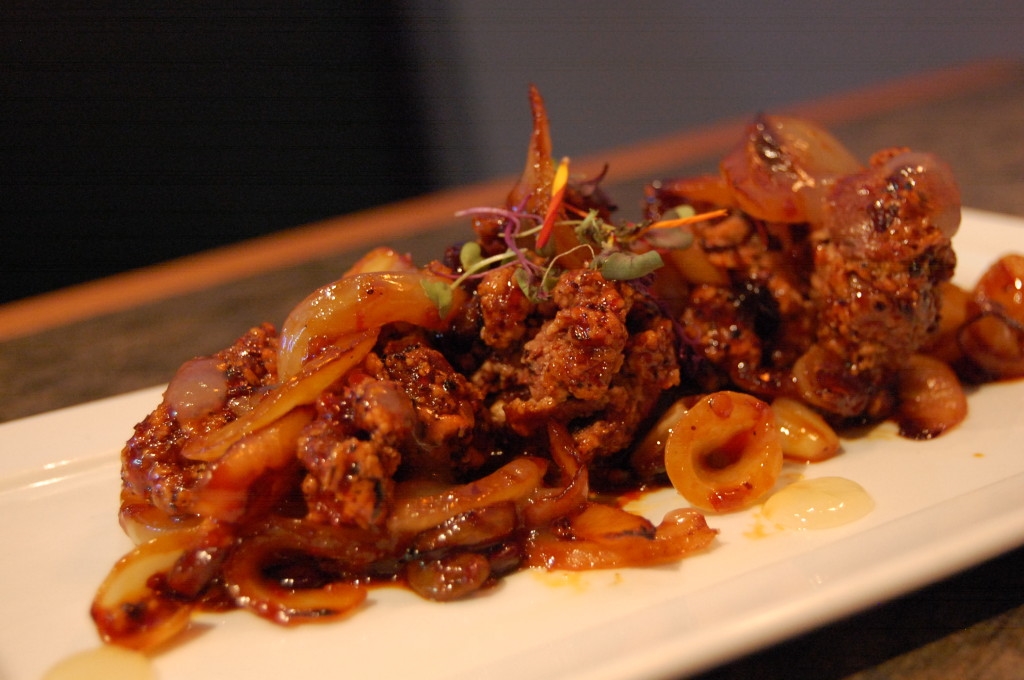
The chicken livers (my favourite) were a big hit. I was surprised at how many people were willing to experiment and found they really liked them. And they’re so simple to make!
Chicken Livers
Ingredients
Method
- Clean livers by removing fat and connective tissue; cut into bite-sized pieces.
- Caramelize onions in butter and a bit of olive oil with a tablespoon or so of sugar until golden brown. This takes time; don’t rush it. It could take 40 minutes or more over medium heat.
- Add about a half-cup or so of wine (red or white, whatever you happen to be drinking while cooking) and cook until reduced to a thick consistency.
- Add chicken livers with a splash of Worcestershire sauce, a tablespoon or so of fresh thyme and a teaspoon of dried oregano, salt and pepper and cook until done.
You’ll see that they produce quite a bit of liquid; keep cooking until the liquid evaporates and you’ll have a creamy, delicious dish to serve on its own or as an appetizer with crackers. So good! Don’t say “eww”—try it!
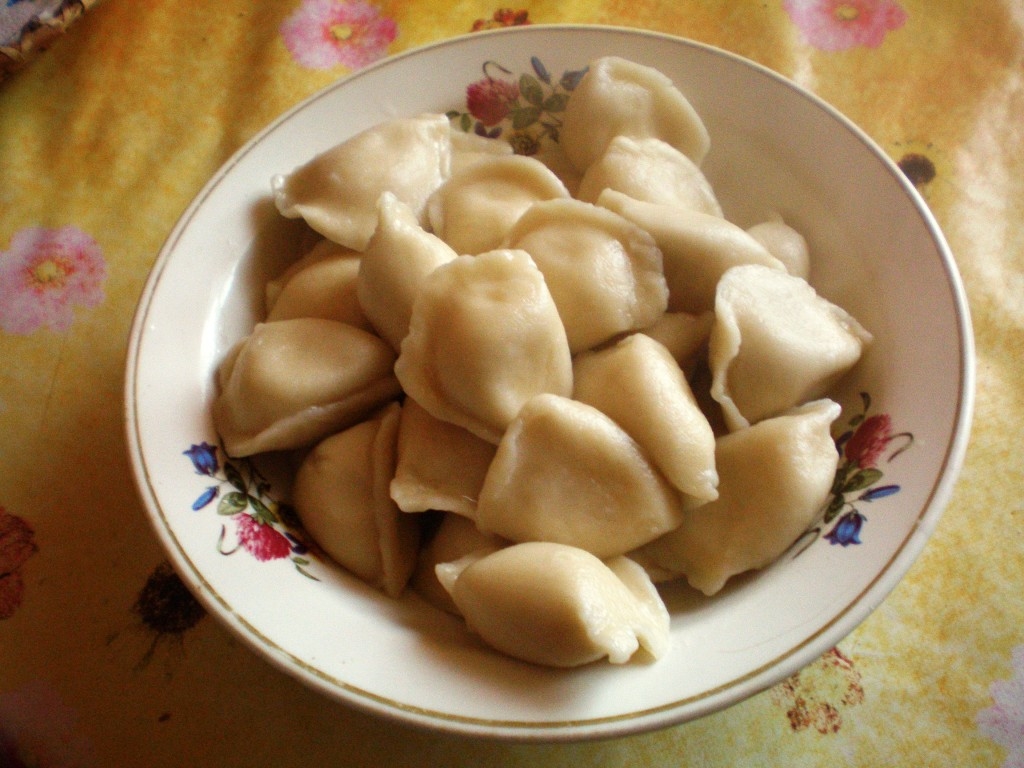
I served the pyrophy in two ways: 1.) boiled with sour cream on the side; and 2.) the way I grew up eating them with a butter, sour cream and onion sauce covering them. I can taste them right now.
I made about 150 of the little dumplings—think pasta dough (sort of) stuffed with cheesy mashed potatoes and boiled. Some people fry them once they’re cooked, but I never had that growing up and I don’t particularly like crispy dough. Personal preference, I guess. Anyway, they’re not difficult to make, but they are time-consuming.
Let me share my secret recipe with you.
Pyrophy
Potato filling
Ingredients
Method
- Boil the potatoes until soft.
- Drain and add butter; mash thoroughly.
- Add cheese; continue to mash until melted.
- Add salt and pepper to taste.
- Add just enough of milk to make them come together. You don’t want runny potatoes for the filling; they should be firm.
Pyrophy dough (my mother’s recipe)
Ingredients
Method
- Put flour and salt into a food processor and pulse to combine.
- Mix egg, milk and butter together and pour into food processor. Run processor until dough comes together and forms a ball; it doesn’t take long. Don’t over-mix.
- Knead dough on a very lightly floured surface until smooth and elastic. (My mother always used to say that it should feel smooth as a baby’s bottom.) It takes a few minutes to get it there.
- Form into a ball and cut into quarters. Working with one quarter at a time, roll out very thin. This is the hardest part since the dough is quite elastic, but keep rolling. I like to roll it and flip it over and over until I get it right.
- Cut into roughly 3?3-inch squares; it doesn’t have to be perfect—my mother told me when I was learning that you want them to look homemade.
- Put a tablespoon of potato filling in the middle and fold the dough corner to corner into a triangle.
- Press the edges together very tightly—this is important. If they’re not completely sealed, they will burst in the boiling water and all your hard work will be for naught. This takes some practice, but you’ll get it!
- Place finished bundles on a parchment-paper-lined baking sheet in a single layer; don’t let them touch each other.
- Knead each quarter a little more before you roll them out, as the air will have dried it a little while it was resting.
- Once you’ve made them all, boil a big pot of water and add some salt.
- When the water is at a rolling boil, add the pyrophy in batches so as not to stop the boiling (I usually do about 12 at a time).
- Boil for about 8 minutes and then toss in melted butter and serve with sour cream on the side. Yummy!
If you’re feeling more adventurous, here’s the recipe for my sauce.
Butter, Sour Cream and Onion Sauce
Ingredients
Method
- Saut? onions in butter until translucent.
- Add sour cream and cook until bubbly.
- Gently toss in the cooked pyrophy and serve.
Enjoy! Yes I know, it’s not low fat. So what? Food is for living!
For dessert, I made a moist and delicious traditional Ukrainian apple cake, as well as Ukrainian Chereshnyanyk cherry bars. Both were perfect at the end of a very rich meal. Not too sweet, but sweet enough to be a great after-dinner treat.
Everyone enjoyed the meal and the company, and I had an absolute blast! I’m already planning our next get-together. I wonder what the group would like? Mexican? Moroccan? Something braised? Maybe I’ll get them to vote. Or maybe I’ll just surprise them!
’Til next time,
Tara
Photo credits
Vodka glass: Conor Lawless
Chicken livers: Stuart Spivack
Potato filling: ginnerobot
Pyrophy: Hugo.arg